Authentication
Current Method (versions >= 1.9.0)
OF DL allows you to log in to your OnlyFans account directly. This simplifies the authentication process significantly. When prompted by the application, log into your OnlyFans account. Do not close the opened window, tab, or navigate away to another webpage. The new window will close automatically when the authentication process has finished.
Some users have reported that "Sign in with Google" has not been working with this authentication method. If you use the Google sign-in option to log into your OnlyFans account, use one of the legacy authentication methods described below.
If you are using docker, follow the special authentication instructions documented to authenticate OF-DL
Legacy Methods
Legacy authentication methods involve creating/editing auth.json file yourself.
Browser Extension
You can use a browser extension to help get the required info for the auth.json file. The extension supports Google Chrome and Firefox and can be found here (https://github.com/whimsical-c4lic0/OF-DL-Auth-Helper/).
Manual Method
Open auth.json in a text editor of your choice. The default windows notepad is sufficient. When you open auth.json for the first time you should see something like this:
{
    "USER_ID": "",
    "USER_AGENT": "",
    "X_BC": "",
    "COOKIE": ""
}
Next, log into OnlyFans, and press F12 to open the dev tools. In the filter box, type api, and open any page on OnlyFans (e.g. Messages). You should see some requests appear in the list within the network tab:
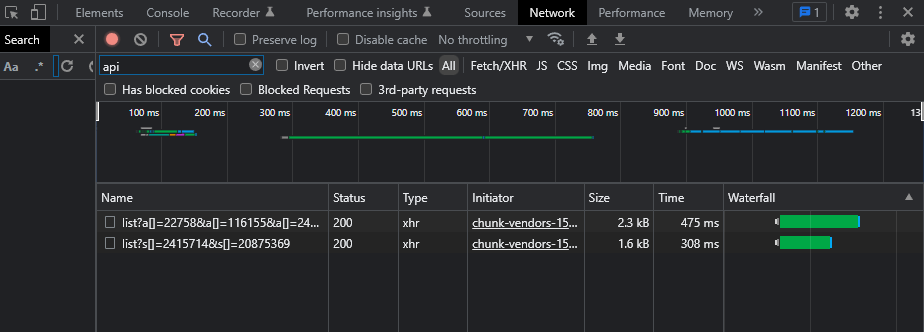
Click on one of the requests you see in the list, and scroll down until you find the 'Request Headers' section.

You should be able to find the 3 fields we need, Cookie, User-Agent and x-bc.
Within Cookie you will find 2 bits of information that we need to copy, these being sess and auth_id.
So heading back to your text editor:
The value of USER_ID will be set to what auth_id is set to.
The value of USER_AGENT will be set to what the User-Agent is set to in the Request Headers.
The value of X_BC will be set to what the X-Bc is set to in the Request Headers.
The value of COOKIE will be set to auth_id=YOUR AUTH_ID HERE; sess=YOUR SESS HERE;, please make sure you copy the values from within the Cookie field found in the Request Headers section.
If you have done everything correct you should end up with something like this (this is all dummy info):
{
  "USER_ID": "123456",
  "USER_AGENT": "Mozilla/5.0 (Windows NT 10.0; Win64; x64; rv:121.0) Gecko/20100101 Firefox/121.0",
  "X_BC": "2a9b28a68e7c03a9f0d3b98c28d70e8105e1f1df",
  "COOKIE": "auth_id=123456; sess=k3s9tnzdc8vt2h47ljxpmwqy5r;"
}